Showing posts with label Swagger. Show all posts

Monday, August 6, 2018

Swagger examined (part 3) How to create a connector to your app using DBSync


— Before proceeding I’d suggest you read Part 1 and Part 2 of this article. —

In this age of integration, you need an edge. The DBSync Swagger API connector is it. If you have a Swagger compliant JSON description of your app’s RESTful API, you can use this tool to create a connector to your app, which can then serve as a bus to connect to other apps, such as Salesforce or Quickbooks, via the DBSync app.

In this tutorial you will learn how to create this kind of connector, enabling you to up your success at creating a meaningful and efficient ecosystem for your business.

Creating a Swagger API connector

Creating a Swagger API connector is simple. You just need to follow these two easy steps:

Step 1: Create a new project.

This step is required only if you don’t already have a project where you want to add the connector. In order to do so, just go to the DBSync app’s menu on the left side, and click on the Projects item. The below figure shows the results screen. Now, click on the Create New Project button, enter the name of your project and press the Save button. Your project will appear on the project’s list on the screen.


Figure 1 – Create a new project

Step 2: Create a new Swagger API connector

Once you have your project ready, select it and go to the main menu item Connectors. Once there, click on the Create New Connector button. You will see a screen asking for a name and connector type. Type in the name of your connector, and select Swagger API Connector from the dropdown menu. Then, click on the Save button. A new screen asking for the connector’s information will appear.


Figure 2 – Connectors’ item in main menu


Figure 3 – Create a new connector


 The, in the next screen (figure 4) enter the following parameters: 
  • 1.      The username and password of your account in your app.
  • 2.      Authentication type: select from the dropdown menu, among the following values:

a.      NoAuth: when no authorization is required.
b.      BasicAuth: when you are using a basic access authentication.
c.      OAuth 2.0: when you need to use the OAuth protocol.
d.      ApiCodeAuth: when the authorization mechanism is defined in your code.
  • 3.      The URL to your RESTful API.
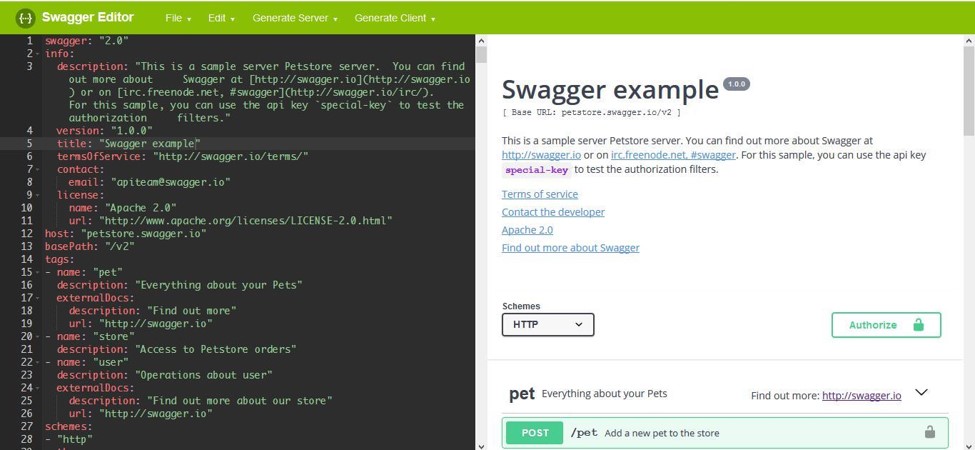
  • 4.      Copy and paste the JSON file that documents your API.


Figure 4 – Connector’s parameters

Once all the required inputs are completed, click on the Save button. You will then see the following screen:


Figure 5 – Connector successfully saved

That is it! Your connector is ready to do the work for you.

You can test the connection by pressing the Validate Connection button, just to be sure that all is working correctly.

Final Words

In these series of three articles on Swagger you have seen the importance of Swagger as a standard for creating APIs. You have also learnt how to create a JSON file that documents your app’s RESTful service. And finally, in this third part, you have understood how to create a Swagger API connector by using DBSync.

Ready to learn more? Check out our website and start your free trial now!

Saturday, August 4, 2018

Swagger examined (part 2): The DBSync’s Swagger API


— If you haven’t already read Part 1 of this article, I strongly recommend you to do it first. —

Have you ever run into difficulty when connecting RESTful services? You are not alone. Many junior developers, as well as seasoned professionals have struggled with this problem. The great news is that the unique challenges posed by these developments, can be lessened with the use of Swagger.

This article continues the previous one with a deeper description of this open source framework, which is a must choice for serious API (Application Programming Interface) developers. Then, it moves on to explaining the basic reasons why you should use it, and how it is employed by DBSync to help you create connectors to apps of your choice, in an easy-to-follow manner. At the end, it includes a link to the next article of this series that explains you how to create customized connectors for your apps.

What is Swagger

Swagger is an open source framework consisting of standards and tools, which help you to design, build, document and consume RESTful web services.

Started as a project by Tony Tam in 2011, it grew in size and importance. At present it is sponsored by SmartBear Software, and it has been eagerly accepted by the market.

Why use Swagger

Reason 1: Add value to your products by creating an ecosystem based on common knowledge

Swagger consists of a set of rules and tools for describing APIs. Its rules standardize practices in areas such as parameter definition, path, responses and more. These tools are language agnostic, meaning that you can choose the programming language you prefer.

Having a common way helps create a system that can be easily connected to others, and that can be updated and modified without difficulty by many developers.

An example is Netflix, which is based on a microservice architecture that provided an innovative and efficient way of delivering a service at scale and in real time. As a result, the company rose to become a market leader.

Reason 2: Gain efficiency through better communication

We all know how difficult it is to translate a business idea into a programming success. One of the main challenges is communication: business, analysts, product managers and users find it difficult to understand the techies’ language.

Swagger is great in this regard, as one of its characteristics is that it is easily comprehensible for developers and non-developers alike, creating a great communication channel.

Thus, for example, product managers, analysts and even users can easily give input about the design, and developers can then translate these ideas into software.

This communication is possible not only during development, but also during testing and documentation, helping create a system that is complete, easy-to-understand and customer oriented.

Reason 3: Use a widely proven tool

Yelp is a company that handles reviews and bookings for businesses. When a company like Yelp, which deals with thousands of people making reviews relies on Swagger, you can be assured that the effectiveness of the framework has been properly proven.

With many important players – such as Netflix, Akana and Yelp – relying on Swagger for their API developments, you should have no doubt about using it.

In addition Swagger has the support of several big companies, such as Microsoft, IBM and Google, through the Open API Initiative.

Reason 4:  Develop with an open source framework

By being open source, Swagger carries many of the benefits of crowd based development, such as cost savings, flexibility, and accountability.

Open source communities have a strong value sense, which results in responsible and efficient products. In addition, many volunteers test its usage, creating a safe option. Besides, you can also be a contributor and join the ranks with giants such as Microsoft and Google by supporting Swagger’s development.

Thus, whether you are a big player with a fat budget or not, you can always benefit by choosing Swagger.

How DBSync uses Swagger
DBSync Cloud uses the main advantages of Swagger to let you create the connector you need. The only thing that you actually need is a JSON file with all the information describing your app’s API.


Figure 1 – Creating a connector
Once you have your JSON file, DBSync helps you create a connector to your app that you can use to create data transfers to other apps, such as Salesforce, Quickbooks and many more. You can even create your customized connector to any two apps, and later on connect them both via DBSync. Once you have the two apps mapped to each other, your data transfer is straightforward.


Figure 2 – Integrating applications

Thus, you can design and build an integrated ecosystem that best fulfills the needs of your business. The possibilities are almost unlimited.

Conclusion

APIs are not new, and at present, they are increasingly used to integrate apps. Basically, when you create a Swagger compliant API, you are allowing others to make use of your app. This translates into more business opportunities, more customers and better profits. Swagger, is the right technology to achieve this.

In Part 3 of this article, we will learn how to create a connector to your app with DBSync, by using your API’s JSON.

Find this exciting? Go to our website and try any of our products for free. If you have any queries, contact us, and we will contact you as soon as possible.

Friday, August 3, 2018

Swagger examined (part 1) How to document an API with incredible simplicity


Do you know what Swagger’s main characteristic is? It is its incredible simplicity: its capacity to easily and utterly describe how an API works, where it resides, what inputs it needs, and what results it produces.

It is this simplicity that helped Swagger make itself one of the most successful developmental tools available on the market.

It is the same need for efficiency that makes Swagger compliant REST services so invaluable when a new API is created.

In this article you will learn the basics on how to create a Swagger RESTful documentation based on another popular technology known as JSON.

So let’s start by learning about a great tool: the Swagger Editor

Using Swagger
There are several editing tools that can help you to create Swagger compliant APIs. One of them is the Swagger Editor, which you can use to create your API documentation. It is an open source tool that you can download or use it online.


Figure 1 – Swagger Editor

Learning JSON

If you are looking for a good reference on JSON, you can consult the standard available here. Alternatively, you can also read the RFC 7159 that is available here. Both of them present a complete description of JSON, but they are very technical.

Alternatively, if you need a rookie’s site that will teach you JSON from scratch, you can go to W3SCHOOLS.

Document description

The Swagger standard defines the structure of the JSON file that describes a RESTful web service.
Here below is a simplified description of the main sections.

Document sections

The main sections that you need to understand are: the API declaration, the paths and the definitions.

API declaration

The API declaration section describes the main aspects of an API, such as its title, version, where it is hosted, the schemes that it uses, and the MIME types it consumes and produces.
The required parts are:

  • 1.      Swagger version:  specifies the Swagger Specification version being used.
  • 2.      basePath: the root URL serving theAPI.
  • 3.      The apis or paths section: a list of the APIs exposed on this resource. There must be no more than one APIS object per path.

The consumes and produces sections list the MIME types the resource consumes and produces.
Additional information shown in the figure below, which is optional, includes the license, the host and the x-parameters. The x-parameters, such as x-response-strategy, are pairs of keys and values defined by you.


Figure 2 – API declaration

MIME types
The MIME types that can be consumed or produced are summarized in the table below. In our example we use a JSON type, but XML and XHTML are also other possible options.


Table 1 – MIME types

Paths
The path describes the different operations. The required parameters are:
  • 1.      The method required to invoke the operation. The possible values are:  GET, POST, HEAD, PUT, PATCH, DELETE, OPTIONS and TRACE.
  • 2.      Parameters: are the inputs to the operation. Each parameter must include its name and type. Other characteristics are optional.

Additional parameters shown in the below figure, which are optional, are:
  • 1.      Produces: a list of MIME types produced. In this case JSON type.
  • 2.      Responses: a description of the responses available in this operation.
  • 3.      Path parameters: between curly brackets, they must be provided by the API call.


Figure 2: paths

Definitions
The definitions or data models section contains a list of data objects. Each data object can have several parameters.
The required parameters are:
  • 1.      Name: the name of the data object.
  • 2.      Properties: the fields that define the data object. Each property has a name and a type.


Figure 3 – definitions

Where to find more information
The best reference is the official Swagger page, which is available here.

Conclusion
The Swagger standard provides a great tool to document APIs. In this article you have learnt the main components of this documentation, namely API declaration, paths and definitions or data models.
In the next article of this series you will read about the general characteristics of Swagger, its core benefits and how DBSync uses it for your businesses.
If you want to learn more about this wonderful technology, consult the Swagger page. Even more, if you want to learn how we have applied Swagger to apps integration, visit our page.